So this is a little project that I started way back around the 4th of July, but between it being a very busy summer and a lot of unexpected challenges popping up with it, two months later I can finally say that my Legos have a new home in our family room … and I think it looks kinda cool! 😉
The main goal for this project was more space, more space, more space.
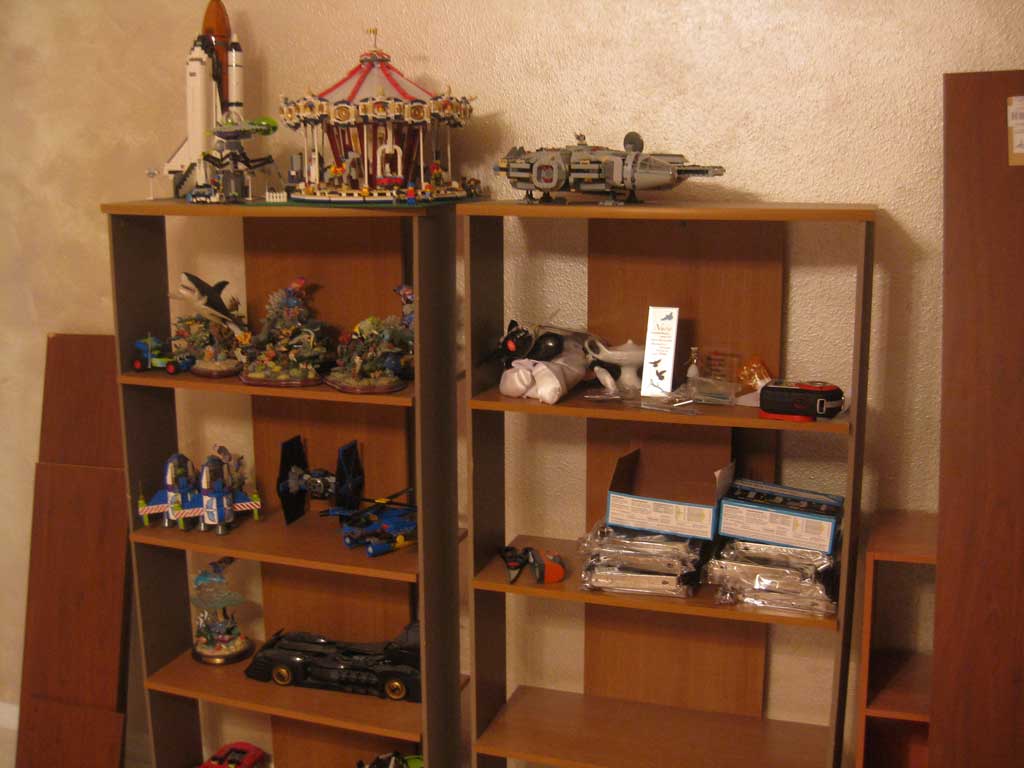
We previously kept our completed Lego sets on a pair of bookshelves that I used to have in my office, with overflow pretty much anywhere we could find it, which was getting a little out of hand as the collection continues to grow! I wanted to build something that I wouldn’t immediately fill up overnight – something that we could grow into over at least a little while.
…and ironically you’ll see that free space is already less abundant than I would’ve thought, but more about that later…
It’s kind of funny that I sort of had this same type of setup in my bedroom over my bed back home when I was growing up. My Dad had recognized the need, so he got a bunch of brackets and mounted them to the wall, then threw up five or six pieces of counter-top remnants that he had for one reason or another, and that’s where my childhood Lego collection grew – from monorails to pirate ships to castles and everything in between!
Now that I’m an adult, my collection may have started anew, but it’s still growing probably even stronger than before because I’ve got a job that pays more than $1/week! I needed a new place to store a collection that will keep growing and growing both before and after we have kids, so that’s a pretty tall order to consider… 😛
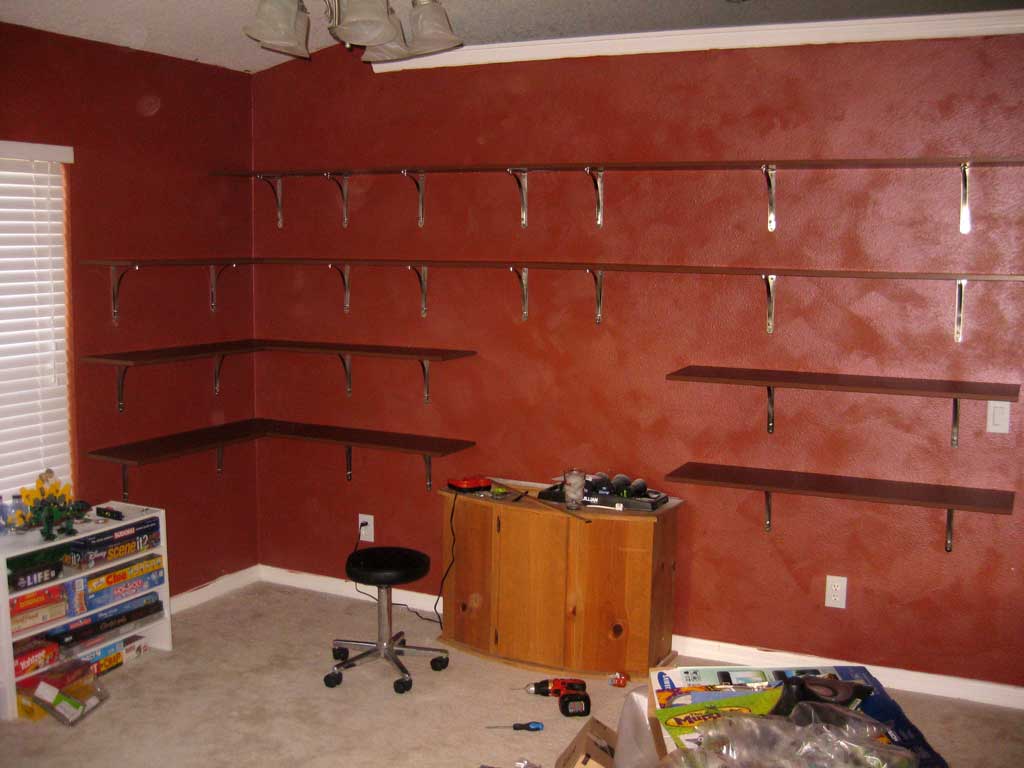
Anyways, the idea started back in July when we were wandering around Lowe’s picking up stuff for various home improvement projects that we wanted to do. We kinda/REALLY went overboard and ended up buying about 5 projects worth of stuff – one of which was the first of several sets of the boards that I picked out for these shelves. The plan in theory was pretty simple – the back wall in our family room would become covered with shelves, from floor to ceiling, with a small cut-out in the middle for my wife’s fish tank.
…which we later decided is actually going to become a Lego fish tank, so stay tuned for that!

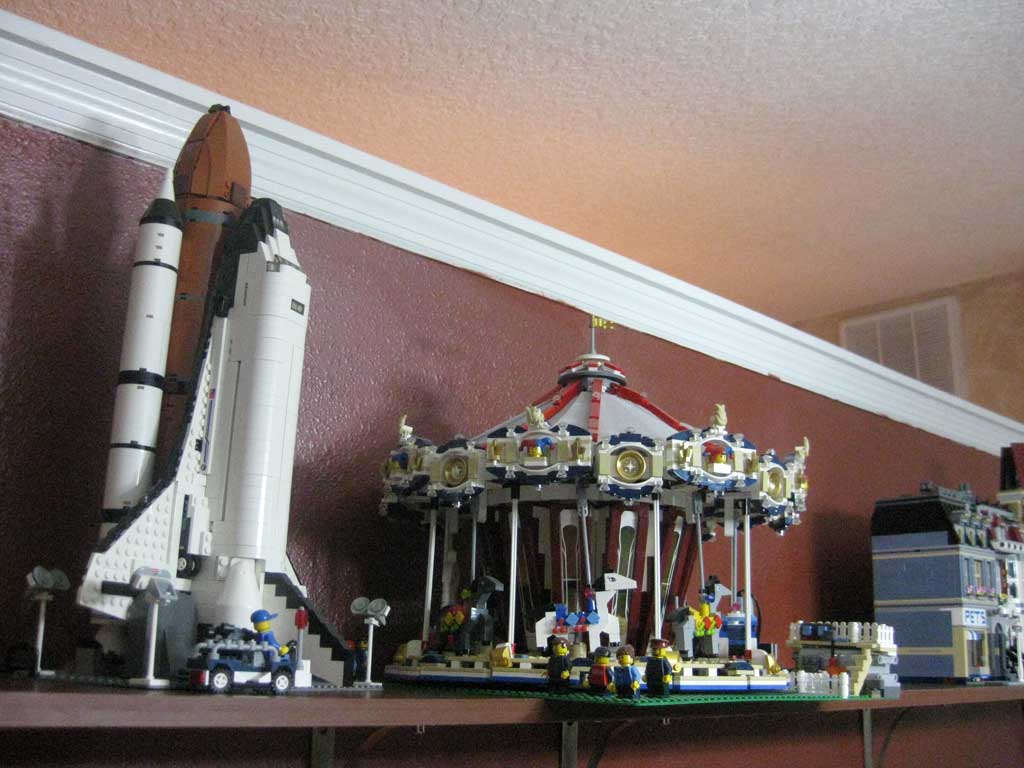
All in all, the finished plans would yield 45.5 feet of shelf space across the four tiers you see, with roughly 14 inches of vertical space between shelves and some extra height on the top and second tiers for extra-tall models like the Space Shuttle and the Tower of Orthanc.
The parts breakdown worked out about like this:
- the shelves themselves – 11 boards @ $10 average each (Lowe’s cut them into the sizes I needed)
- brackets – 13 sets of 2 @ $10 each
- wall anchors – 2 per bracket plus several errors and trialing different types … about $50
- misc. screws for anchors and securing boards … about $10
- anchor plates to run between adjoining boards … about $15
- estimated total – $315
The numerous challenges that I encountered throughout this two-month journey…
- My first Lowe’s didn’t have enough boards and brackets, so I ended up having to go to a second store.
- It wasn’t until I started opening up the brackets that I noticed many of them were bent … at least half a dozen … and returning to store #2, I found many still on their shelves looked just as bad. Was lucky that the rep worked with me to create matching pairs of good ones with whatever they had left and promptly exchanged the ones I had, no questions asked.
- Realized that my laser level was pretty much dead, and was subsequently shocked to see how expensive laser levels are these days.
- Took a while to get all of the brackets installed because even with the level I kept measuring wrong and drilled some holes in the wrong spots.
- When I got ready to install brackets on the side wall to the left, realized that opposed to the internal wall that most of the shelves are on, that side wall is actually the external wall to the house … meaning that there’s concrete brick within a few inches of the other side of the drywall. Crap. Took some experimenting with different drywall anchors to find a style that would actually work. Ended up using the same ones that I used elsewhere, but drilled two holes side by side to fit the anchor in already mostly extended, then turned it to lock it into place.
- Also had to buy just the right length of screws to work with said anchors that would hold the brackets in place tightly without running out of space at the concrete bricks. 1/4″ ended up making the difference, and yes, I bought both sizes before I found the right one… 🙁
- Had to go to Home Depot to find anchor plates to run between the boards that touched (to level them) because I couldn’t find them at Lowe’s. Eventually did find them there, too, because I needed more and didn’t want to go to two stores, but wasn’t super thrilled with the ones I got because Lowe’s was out of the smaller ones.
- Ended up having to pull out and realign several of the brackets for the top shelves after finding that they were a couple of inches too high at the right end.
- The shorter screws that I bought the first time to hold the boards down to the brackets … sucked. They were a self-drilling type, which I thought would be better because I knew that the particle board was really tough to dig into, but on the contrary, the “self drill” tip ended up taking up half the shaft of these screws that were only 3/4″ to begin with, so they ended up falling out of the shelves because there was barely anything to bite into the board with after the drill part. Ended up swapping them out for normal screws that I had to pre-drill holes for and those worked great.
- Also, I wish that I’d discovered the benefit of pre-drilling holes earlier in this project!!! I honestly didn’t start until the final push and it was so much easier than fighting each wabbling screw until it finally took! This alone probably would’ve cut down my frustrations by probably 25%.
- Stopped and started this project many times throughout all of this because each of these items became very frustrating … I’d literally set aside an hour to work on my shelves and then get maybe 10 minutes before a new problem would arise and I’d be making yet another trip to Lowe’s for more parts! I probably made 6-10 trips for these stupid shelves by the time all was said and done … maybe I should add a fuel surcharge to that cost list, too! 😯
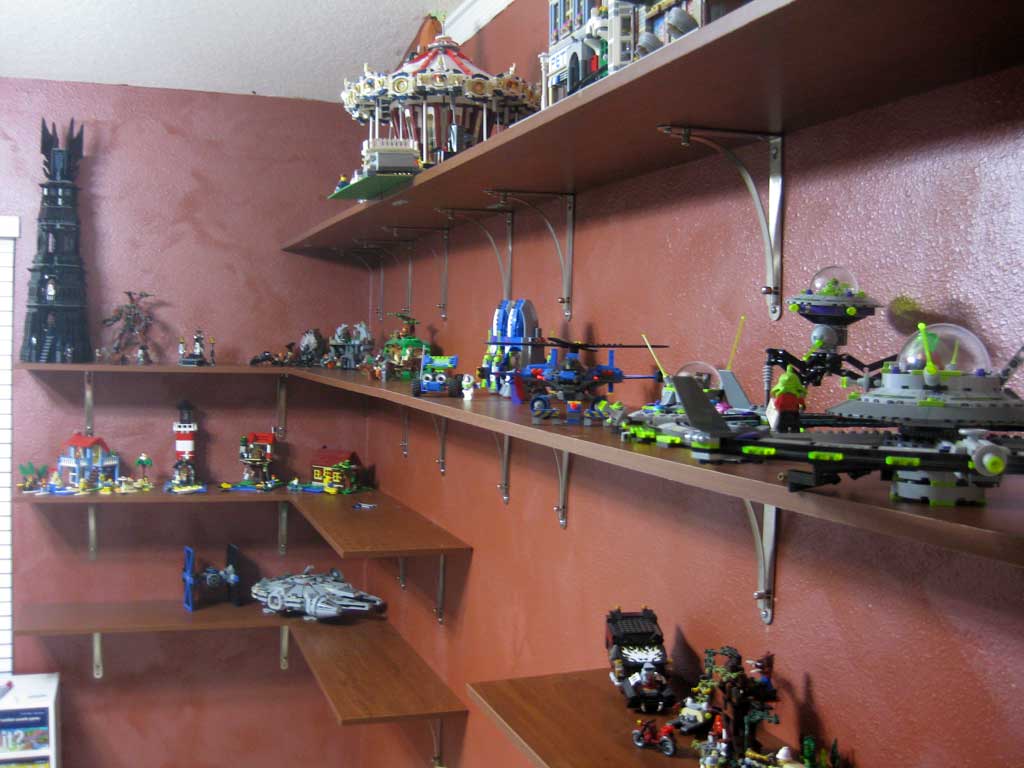
But nonetheless, they’re done now, so take a look at the final product!
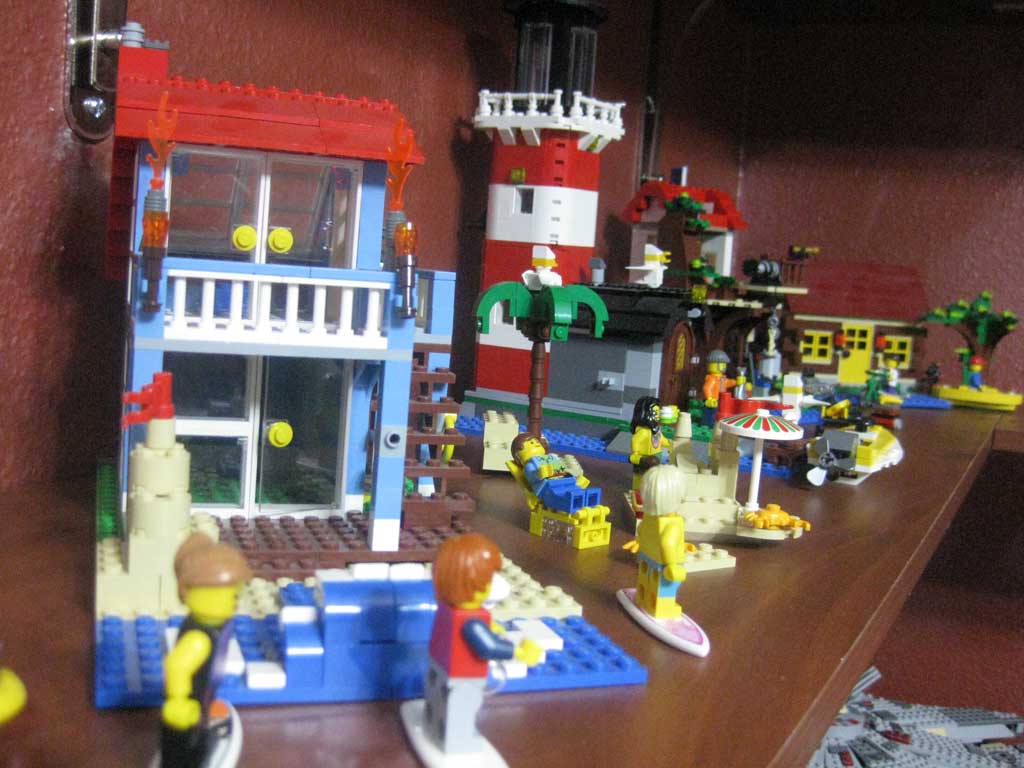
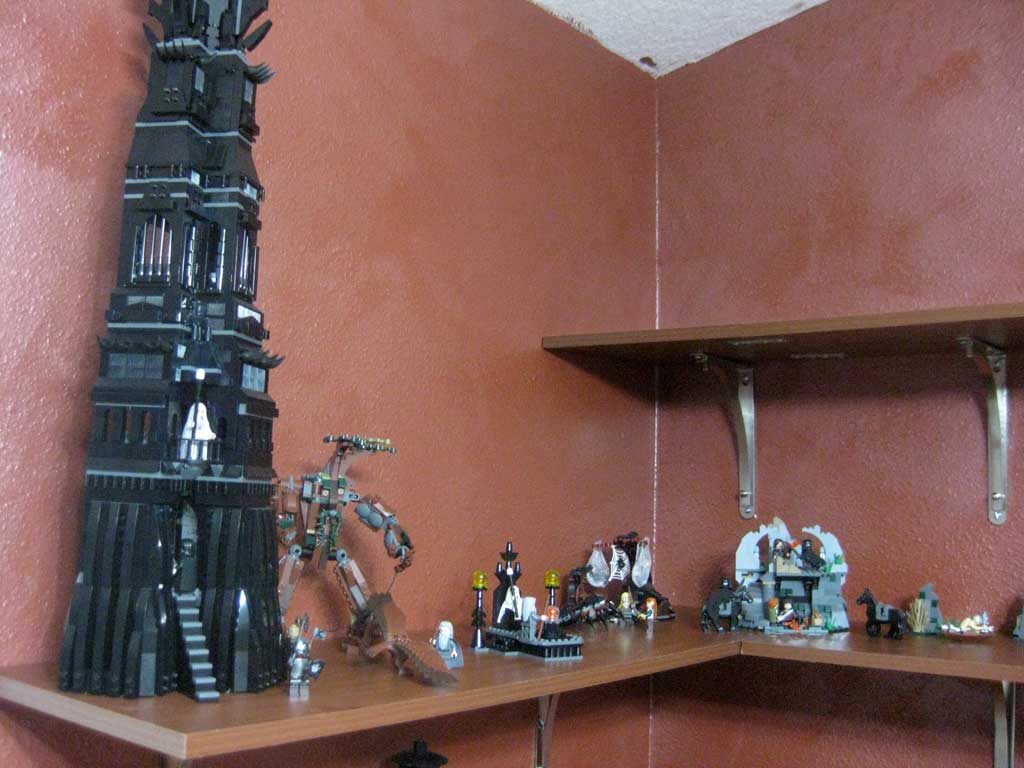
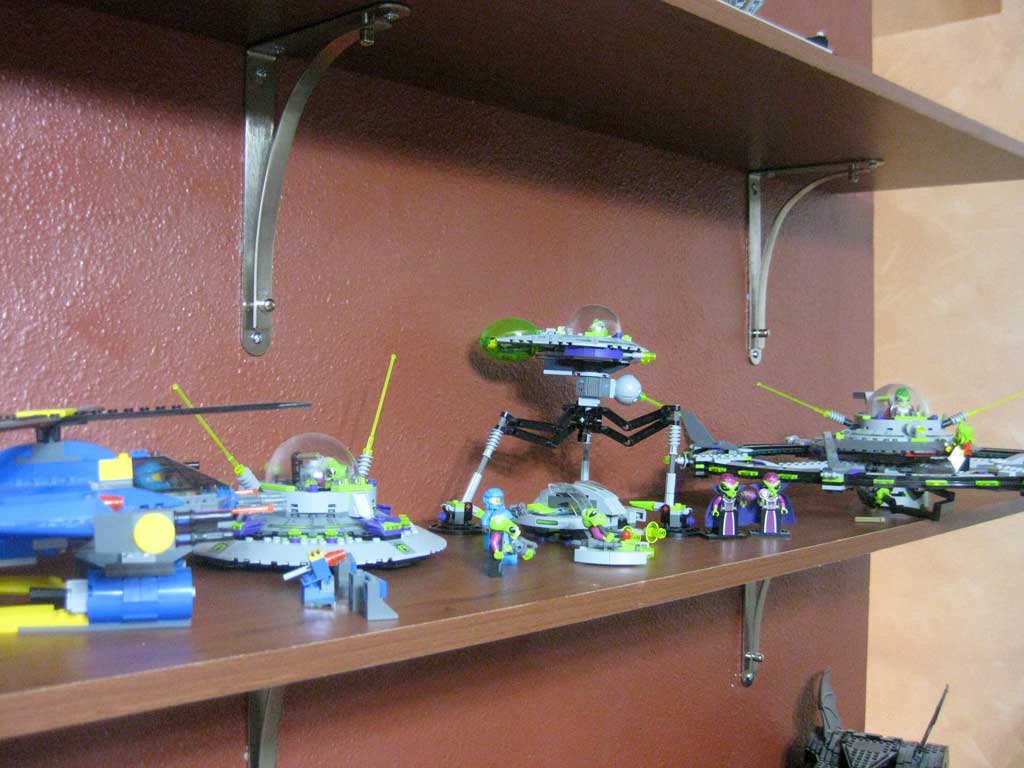

As I eluded to earlier, I guess my biggest concern is that even with a seemingly large 45 feet of space, you can already see where most of the shelves have been accounted for with various series, even if they’re not very full yet. I would say that the LOTR/The Hobbit section will be the most full, considering that I have two other sets sitting here that I haven’t built yet, but even look at the modular buildings or the lake house/cottage/whatever it’s called collections that Sara has been working on – a few more sets and each of those are going to fill up pretty quick!
It’s kind of funny because my Mom has slowly been mailing me down my old Lego sets a few at a time – she literally has a huge bin with all of them, so every so often she picks a few manuals and finds the pieces for them, puts ’em in ziplock baggies, and throws them in a box for me! So far they’ve just been stuck away in that same priority mail box because I didn’t have shelf space to unload them, and yet even now with this new project, I still wouldn’t have room if she were to send me many more of them!!!
Good grief, that’s a lot of Legos. 
I think the tough part for me is that not only do I want them on shelves, but I want the shelves to look nice and be somewhat organized … meaning not having sets piled on top of each other and being able to lay them out by theme, even in some scenes like I’ve done with LOTR. I’m sure that these shelves will manage for a few years, but once we’ve got a kid who’s getting just as many Lego sets for holidays as I do?!
I guess we’ll just have to cross that path when we come to it… 😉
So a few quick takeaways before I wrap this up, if I were to do it again:
- I’d add a couple more inches between shelves. These were based on 14″ – the same dimensions of the bookshelves I was using prior, but it didn’t click that my biggest sets had been sitting on top of the units. About 16″ would probably do it … 18″ if I wanted to fit the shuttle, too. The Tower is a whopping 28″ tall, but I kinda planned for it to be in that corner where it is! Not sure what I’ll do if they build a matching tower for Sauron, though…
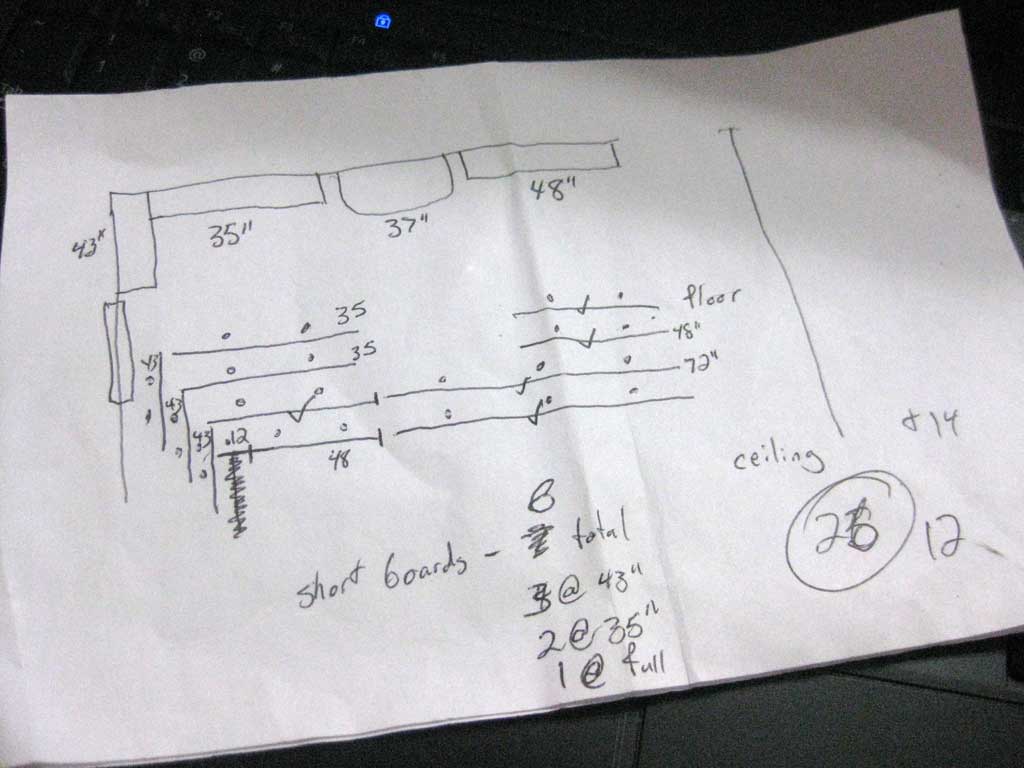
- Mapping out shelves was really important – before I got too far, I sat down with a pen and paper and sketched out roughly what I was envisioning with measurements so I’d know how many boards to buy and how they needed to be cut, like so:
- Making a list before going to the store with specific counts for things like anchors and screws would’ve reduced my number of trips.
- Paying attention at the store also would’ve helped, as one trip was because I thought that a package had 12 screws in it, whereas they were #12 screws with a quantity of 8 per bag. Likewise in my favor, when I was looking for anchor plates, I had to pass on the size that I did want because the one bag that they had only had 3 plates inside instead of the 4 that it should’ve.
- Measure twice, drill holes in the wall once.
- Do it all at once instead of dragging it out so long. Whenever I’d get frustrated, I’d often times screw up more and then eventually give up altogether. If I’d just dedicated an entire weekend to building these, frustrations and all, they’d probably have been done back in July…
Either way, though, they’re done now, and now I can get back to the fun part – building new Lego sets to put on them! 😀