
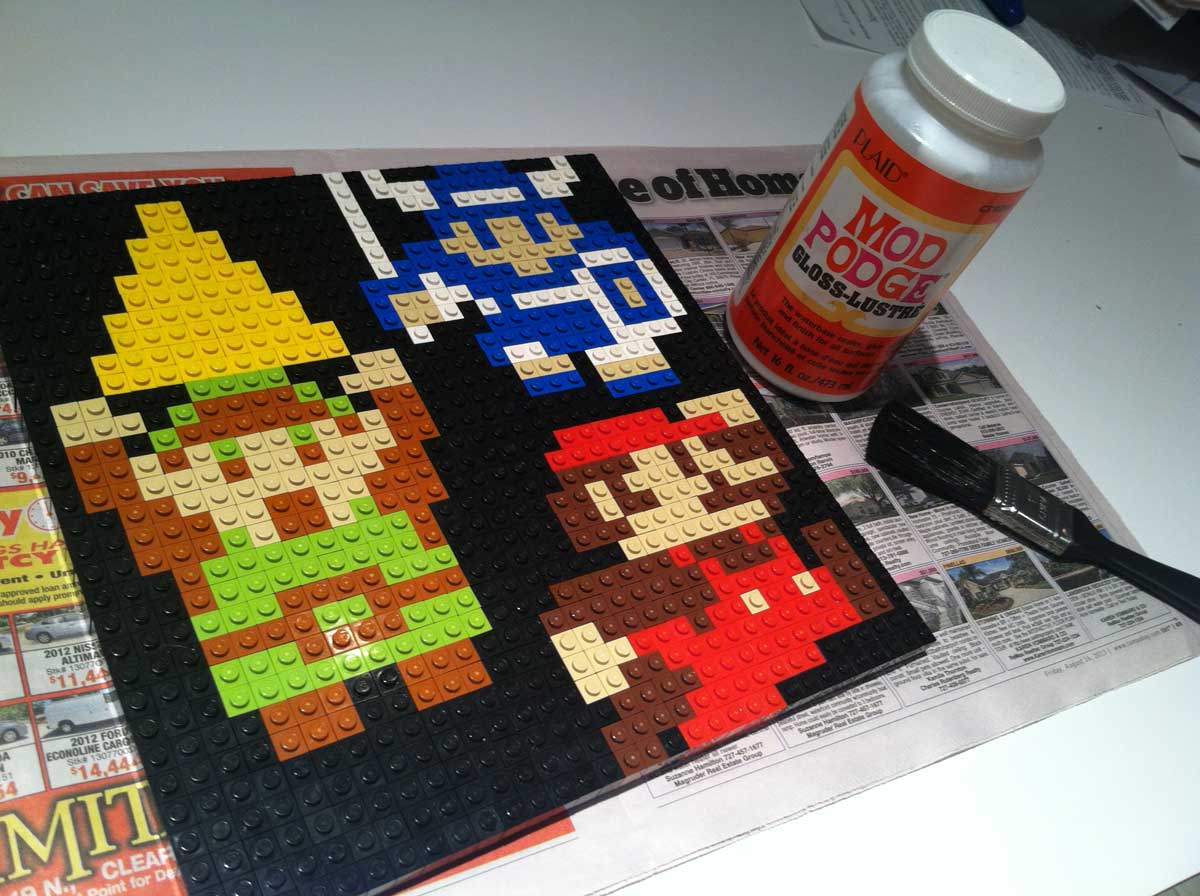
Hey! Remember that really cool NES Lego Mosaic that I made something like 5 months ago?!
Well, I finally got around to actually finishing it! 😯
And by finishing it, I mean gluing and framing it to hang on my wall … so let’s talk about that.
So finding the right glue to do this is part of why it took me so long because it was kind of a pain and I wanted to make sure that I tested them before inadvertently ruined my 8-bit masterpiece! I first tried a couple of different spray adhesives from Walmart and Home Depot because I wanted something simple … I’ve read one or two accounts of mosaic creators essentially building the whole thing and then going back through and gluing each brick into place by hand one at a time … which I have nowhere near the patience to do!
I figured that a spray would be easy, but after testing it on a simple 10×10 square that I made with extra bricks on a spare base plate, neither of them ended up drying clear and they looked pretty bad. So I tabled the whole idea for a while until my wife had been working on some puzzles and had gotten her glue out to glue them together afterwards, and it made me wonder if the same stuff would work for bricks, too.
And it did! 🙂
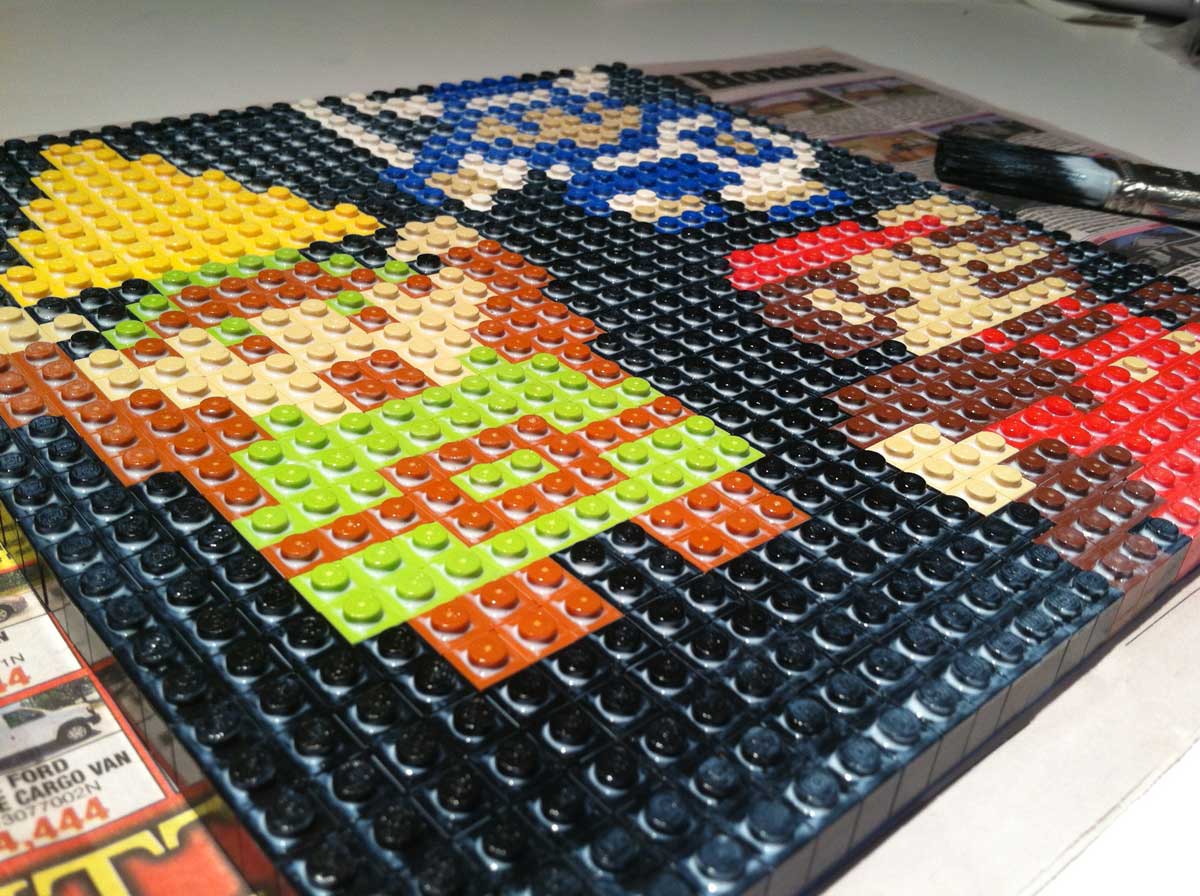
The stuff is called Mod Podge and you can buy it pretty much anywhere. It looks a lot like Elmer’s Glue, and the trick is to put it on super thin – you can see in the pictures that I basically applied some to the bottom half of the mosaic, and then pretty much used the excess from that to cover the rest…
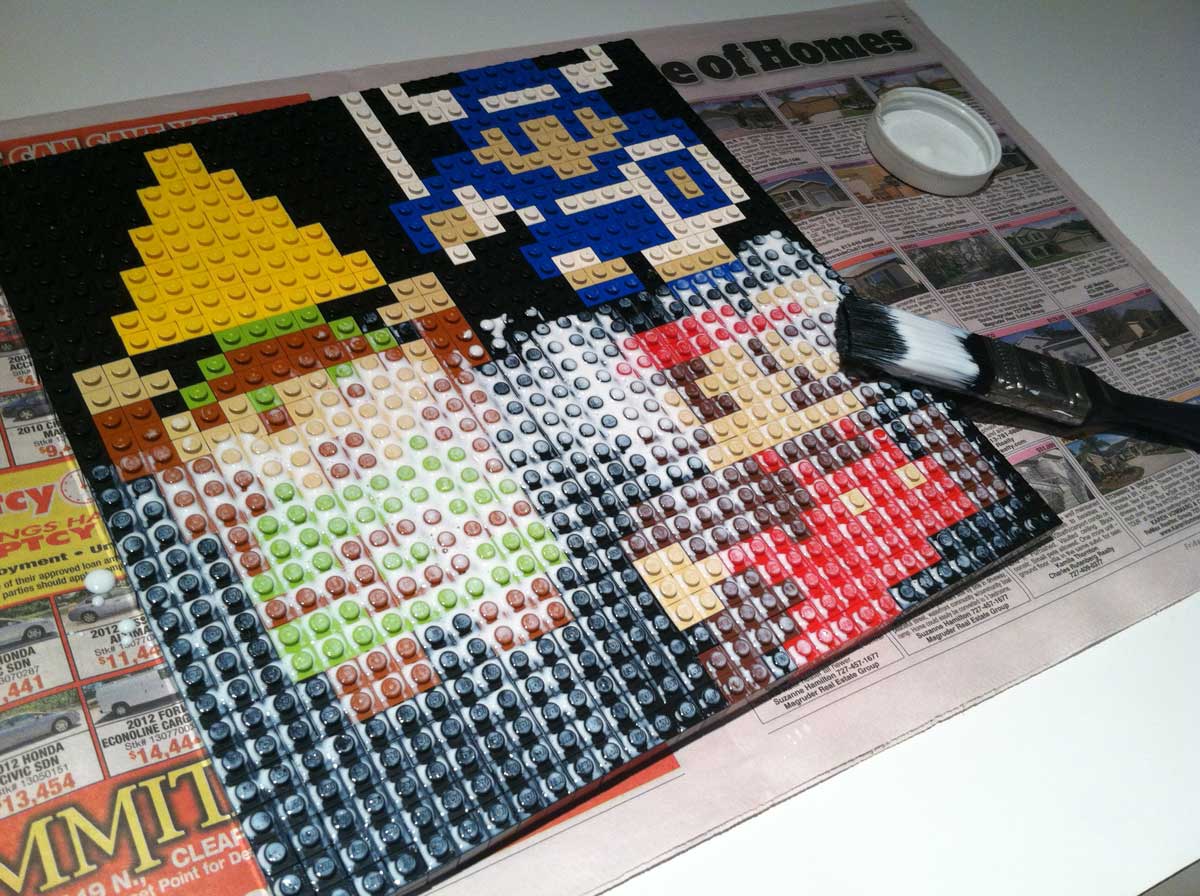
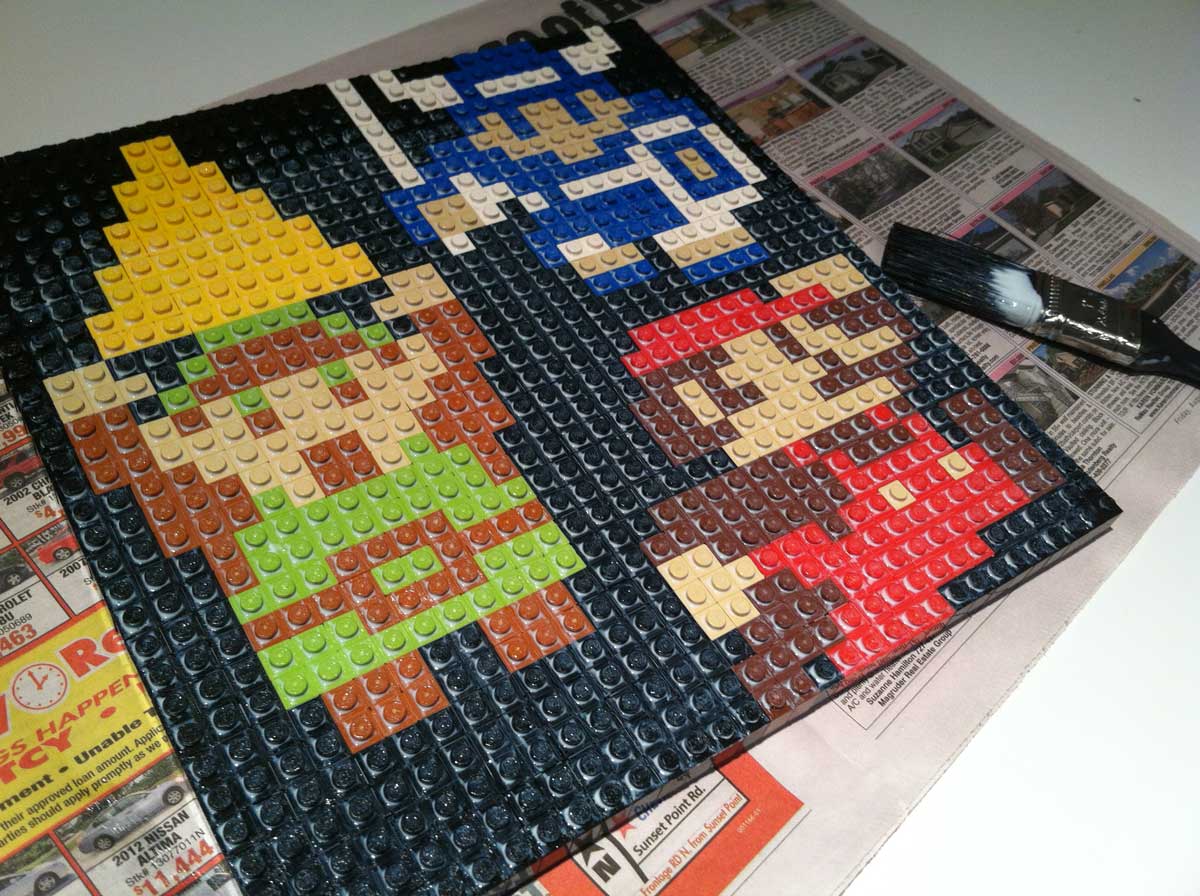
It ended up going on pretty easy, though I’d still recommend a test run to anyone just so that you know what you’re in for before slathering down a layer of glue on something that you’ve worked really hard on. And note, the goal here wasn’t to make the completely and utterly unbreakable – as I found with my test piece, I could bend the board and see separation between the bricks – but as long as you’re not tossing the thing around the room, they’ll at least stay in place after a simple coat. I would’ve loved to not need the glue and just leave them natural, but some of the bricks are a little loose on the board and even when you just hold it vertically to look at it, pieces would fall out all over the floor. *cringe* So the glue was really a necessity.
It probably took me maybe 5-10 minutes to lay down the glue, mostly just brushing back and forth to try and spread it out as much as possible. You want to get rid of where you can see white accumulating as much as possible because while it does dry clear, you can still see the excess glue around the pegs if it goes on too thick. And be sure to get the edges, too – if you’re framing like I did, you won’t even see them anyways, and it’s a really good opportunity to get some added support along the sides where bricks are more likely to fall loose.
So after the glue came the framing, and this too required a bit of testing because I found it more difficult to find a 10″x10″ square frame (the size of a base plate) than I would’ve thought! I first tried an old record frame that I had laying around, but that ended up being too big and I really didn’t want to hassle with trying to matte them or anything. Eventually my search took me to Michael’s where they have those make your own frame kits, and it even took two stores to get both kits that I would need, but after dropping $10 and 1/4 tank of gas on frame parts, I got home and found … the frame wasn’t deep enough to fit around the bricks. It was pretty close, but still off by just enough to make the frame useless, so at that point I turned to a company online that I’ve ordered frames from before with great success – frameusa.com.
Honestly the only reason why I didn’t just go with these guys in the first place was because the shipping kinda hurts unless you’re buying a bunch of frames at once. Case in point – the parts I ended up ordering was the same two frame kits as before for about $10, but then I also paid another $10 in shipping. I knew that I’d probably need more in the future, but I wanted to make sure they would work before sinking a bunch of money into frames that wouldn’t … I even ended up e-mailing customer service before I placed my order to check and they verified that the model I was interested in was 1/8″ deeper than their standard line.
The kits that I used were these:
Assembly is super easy – you just screw some little plates into the edges to connect them together around your piece, and they also include these little spring clips that you can put in behind the piece to make sure that it fits nice and snug. Now that I’ve seen how they look, I’m sure I’ll end up ordering several more for my next mosaics, and it’s kind of neat that you can get them in different colors, too, because although I think simple black works well for these video game mosaics that I’m doing now, I could see possibly trying some other colors for future mosaics maybe for a kid’s room or something where you might want to be a little more colorful than just black.
Anyways, so here’s the final piece now mounted on my wall…
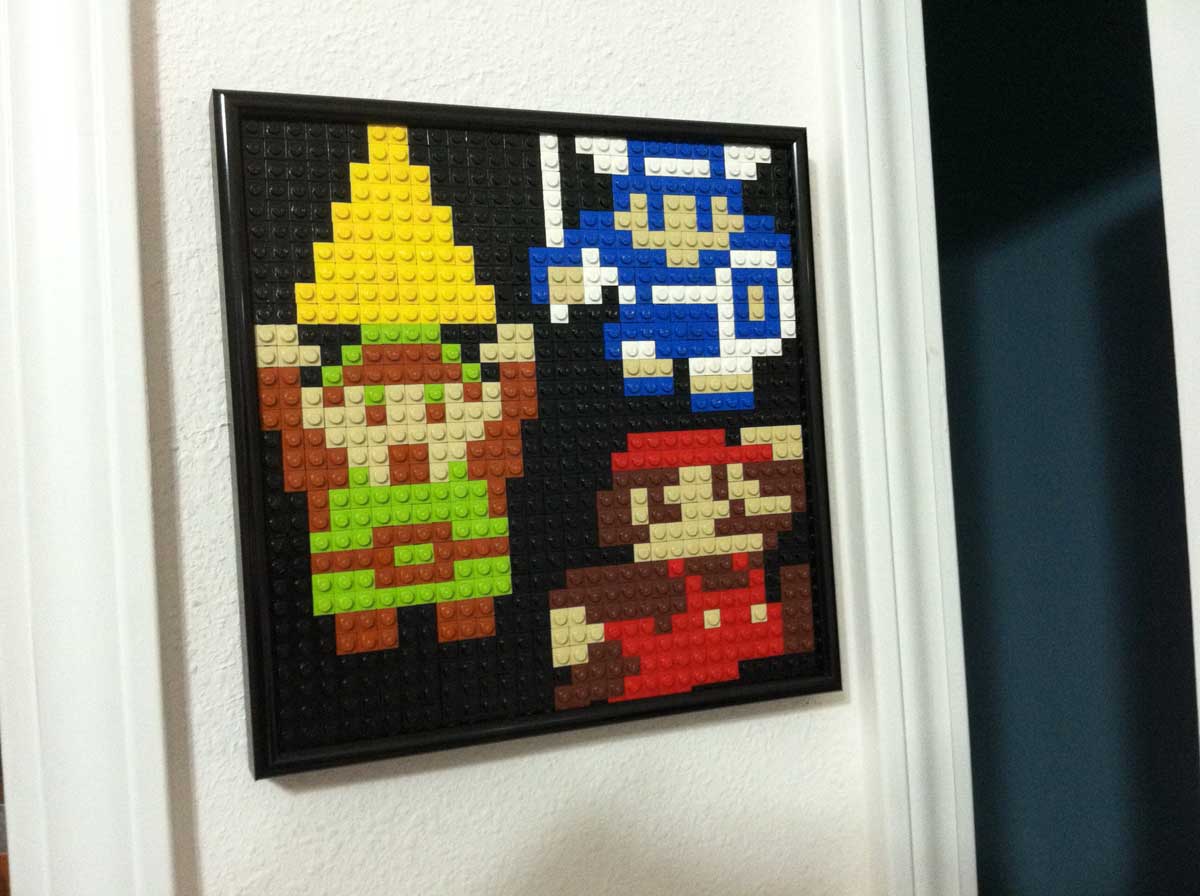
I’m really happy with how it turned out, and the lighting in the picture doesn’t really do it justice. The glue adds a nice shine to the bricks without being overbearing, and I didn’t end up using any glass or anything so I like how you can still feel the texture of the bricks if you touch it.
So my next steps – there’s enough room on that little strip of wall above the light switch in my office that I want to put two more video game mosaics there – one above and other below this one to kind of wrap up this little vision. I need to literally dust off this one for Final Fantasy and figure out what bricks I need to order to complete it … unfortunately, it looks like I lost the Excel file that I’d designed it in so I kind of have to do it all over again. 🙁
As for #3, I’ve been going back and forth with it because there are so many great characters, but I think I’m going to dedicate that one to Mega Man because the others are all about my favorite classic games and the blue bomber was definitely up there on the list of games that were in heavy rotation during my childhood, too.
Plus, I’d still love to eventually do something much bigger like this massive collage, so all of the other characters hopping through my mind could still make an appearance over there instead.
Also, my wife has a Disney-related one of a bit larger scale that she wants to do sometime in the next six months, which may end up being my first multi-base mosaic, so I suppose that’ll give me some practice for eventually doing one even bigger!